
Due to a vendor defect, faculty may experience issues using the Athena Mass Grade Import to upload their final semester grades when using their own spreadsheet, including a spreadsheet exported from eLC. This process will still allow faculty to mass upload their grades while a solution from the vendor is pending.
MAY
11
Monday
Spring 2026 Grades Due (12 PM NOON)
Grade rolls are available in Athena. Any grades not submitted by the appropriate semester deadline will require an electronic grade change submitted online in Athena.
For more information on grade submission, please view the tutorials below.
Checklist prior to submitting your grades in Athena:
-
Review your class list in Athena.
-
Verify you are the instructor of record. If there are multiple instructors listed, determine who will be responsible for submitting the grades.
-
A grade of V indicates the student audited the course.
-
A grade of W indicates the student withdrew from the course.
-
Last Attend Date is required to be entered when assigning a grade of U or F. If the student is receiving the unsuccessful grade because they did not begin attendance in your course, we ask that you use the first date of classes for the semester. Financial Aid will contact you for additional information if it is needed.
-
Review students with variable credit hours. Incorrect hours for a student will need to be corrected by the Office of the Registrar before a grade is assigned.
-
Determine if there are any students who have been attending your course(s) but are not appearing on the class roll. Students not on a class roll but who have been attending should not be allowed to continue in class until cleared by the Office of the Registrar.
-
Each student should receive a grade.
Grade Entry Tutorials
Submitting Final Grades in Athena
How to submit final grades in Athena using various import methods.
Manual Entry
- Log into Athena and navigate to the Grade Entry page by selecting the image on the “Faculty Services” tile, then “Classes & Grades.”
- Select the appropriate course from the list of courses. The gradebook will display below the “My Courses” box.
- Click on the “Final Grade” drop-down box for the selected student to view the final grade options for the selected course.
- Select the desired final grade from the list of available grades. The selected grade will be displayed in the “Final Grade” column.

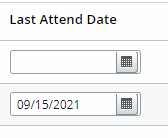
- If the selected grade is an F or U, the “Last Attend Date” will be a required field for the selected student. To enter a last attend date, select the calendar icon, then the appropriate date in the calendar. Alternatively, the date can be typed in a MM/DD/YYYY format. If the student is receiving the unsuccessful grade because they did not begin attendance in your course, we ask that you use the first date of classes for the semester. Financial Aid will contact you for additional information if it is needed.

- If the selected grade is an F or U, the “Last Attend Date” will be a required field for the selected student. To enter a last attend date, select the calendar icon, then the appropriate date in the calendar. Alternatively, the date can be typed in a MM/DD/YYYY format. If the student is receiving the unsuccessful grade because they did not begin attendance in your course, we ask that you use the first date of classes for the semester. Financial Aid will contact you for additional information if it is needed.
- Once all the desired grades have been entered, click “Save.”
- If all students within a class have received a grade, the “Grading Status” will show a status of “Completed.” If any student is missing a grade, the status will display “In Progress.” If none of the students have a grade entered, the status will display “Not Started.”

Mass Uploading
Create Template
- To import final grades from an Excel or CSV file, the template must have the below column headers in this order:
- Term Code
- CRN
- Student ID
- Final Grade
- Last Attended Date a grade of F or U
Note: Any F or U grades will require a date in the Last Attended Date field.
Note: If the student is receiving the unsuccessful grade because they did not begin attendance in your course, we ask that you use the first date of classes for the semester. OSFA will contact you for additional information if it is needed.
- After all the class and student information has been entered, go to the “File” menu and select “Save As”.
- Select where you wish to save the file.
- Enter a file name (maximum 200 characters).
- Click the “Save as type” dropdown and select “Excel Workbook”.
- Navigate to the Grade Entry page in Athena and select the appropriate course.
Import Grades
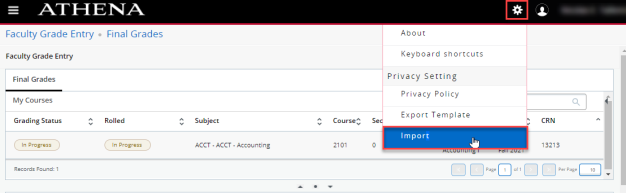
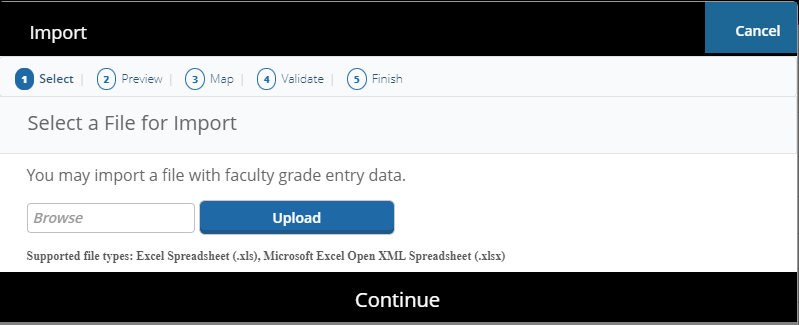
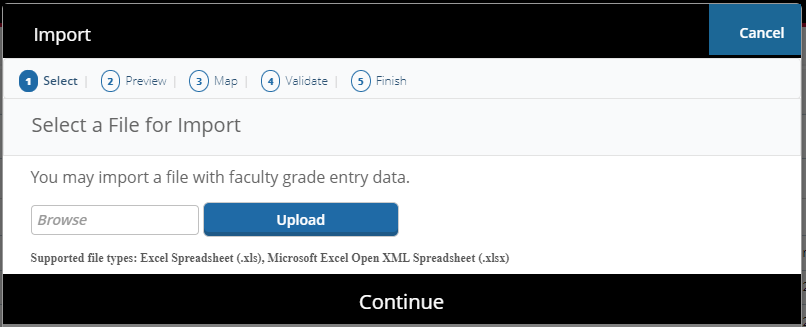
- Select the Gear icon in the top-right corner of the screen, and select the Import page link within the dialog box.
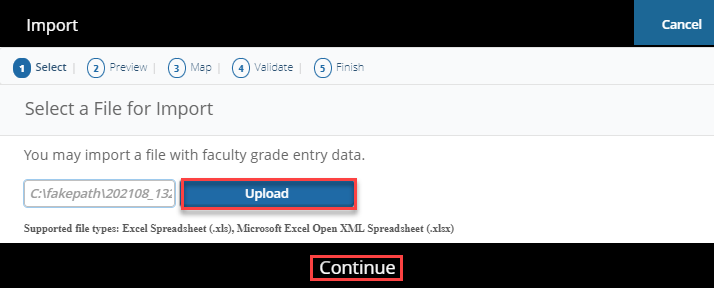
- Click in the Browse field and then select the saved file with the final grades for the course. Afterwards, click Upload.
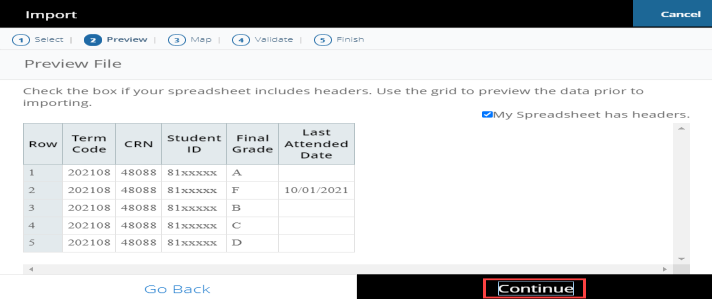
- This opens the Preview page and displays the document uploaded.
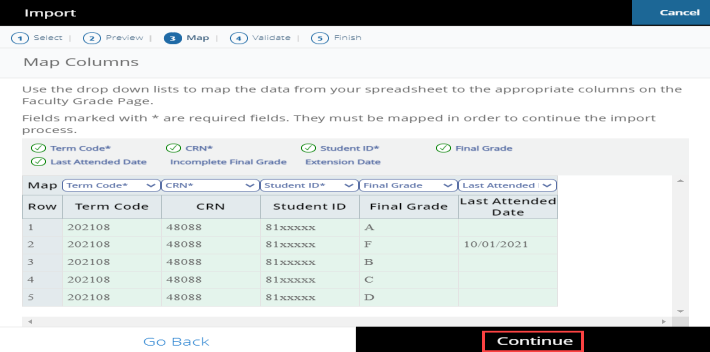
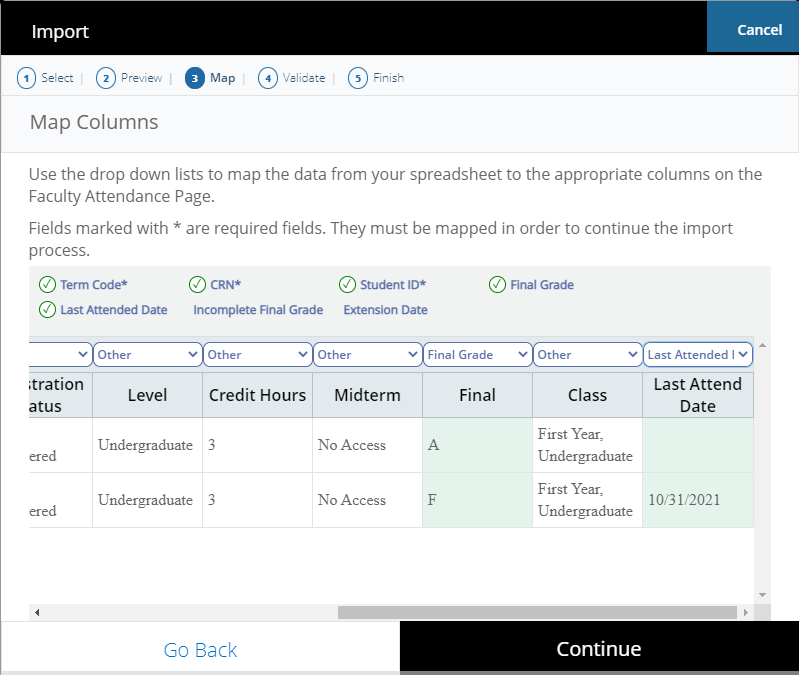
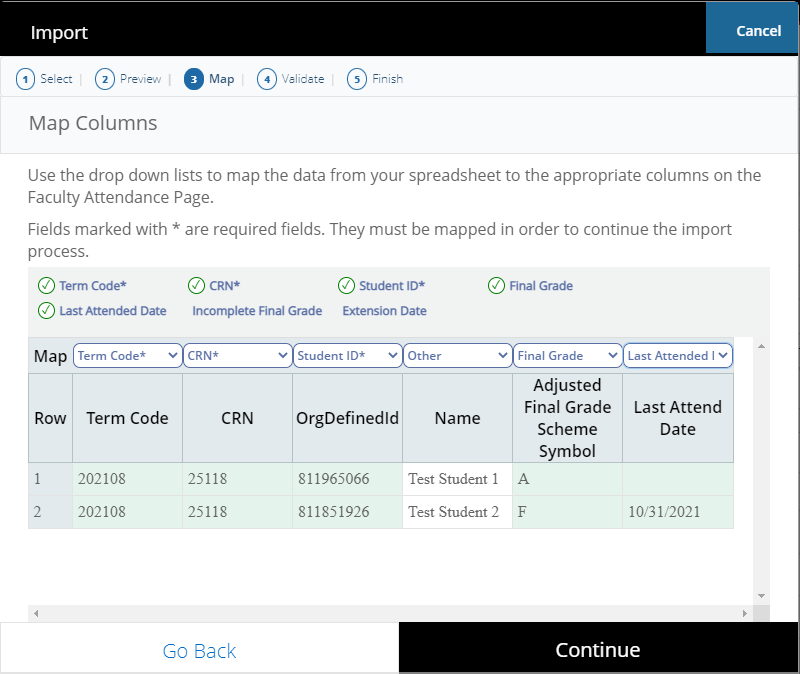
- This opens the Map Columns screen. In this example, the column headers match the designated fields. If the instructor has a different template, they will need to match the columns from the uploaded spreadsheet to the appropriate fields in Athena.
- To match the columns, click the drop-down column headers and select the appropriate header to match the spreadsheet columns being imported.
- Note: If there are any columns that do not match the designated fields, choose the “Other” option. The required fields are indicated with a “*”.
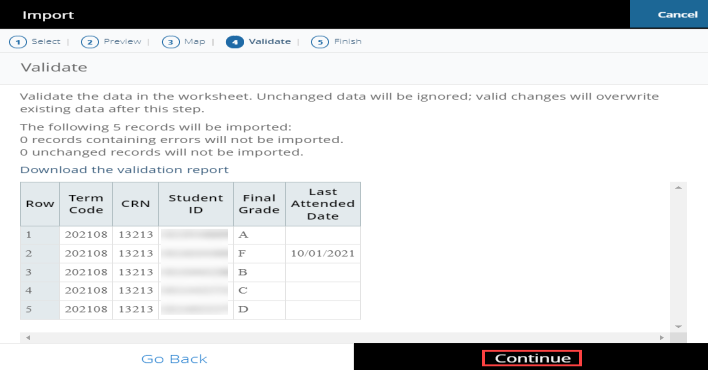
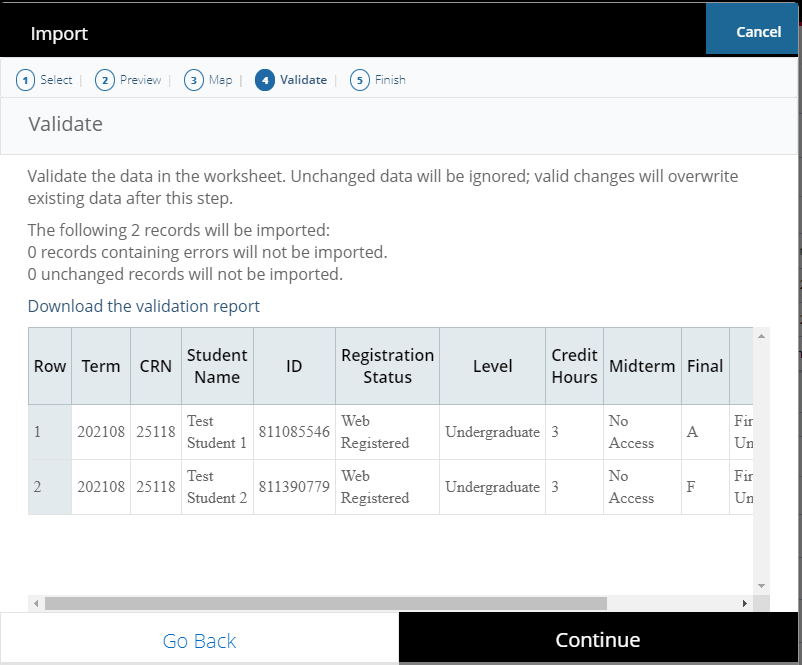
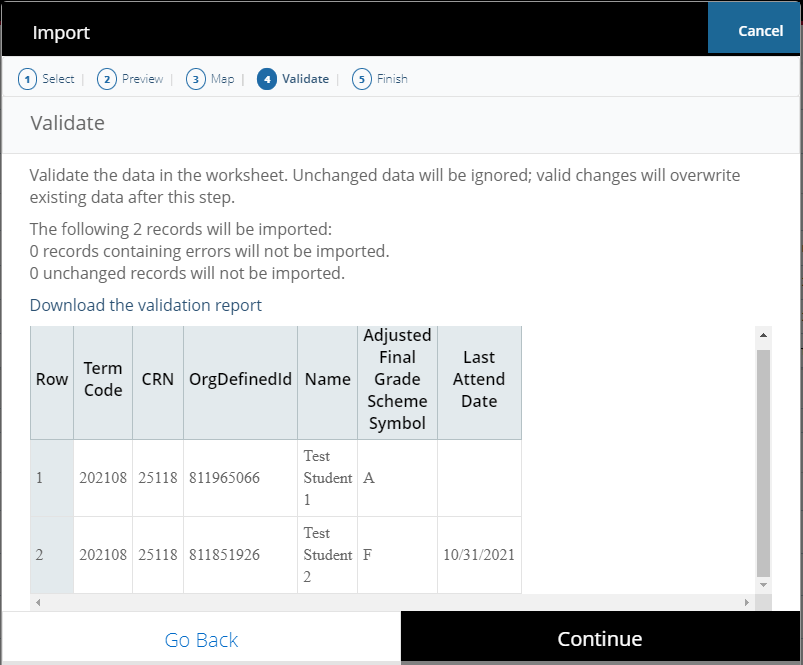
- This opens the Validate screen to check for errors in the spreadsheet.
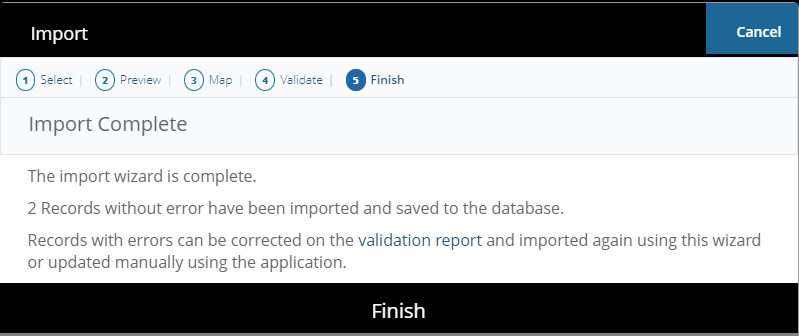
- After confirming the information is correct, click the Finish button.

Import from Athena Class List
- The Class List from the previous version of Athena can also be used to import grades.
- A few rows on the spreadsheet will need to be deleted before importing. Highlight rows 1-14.
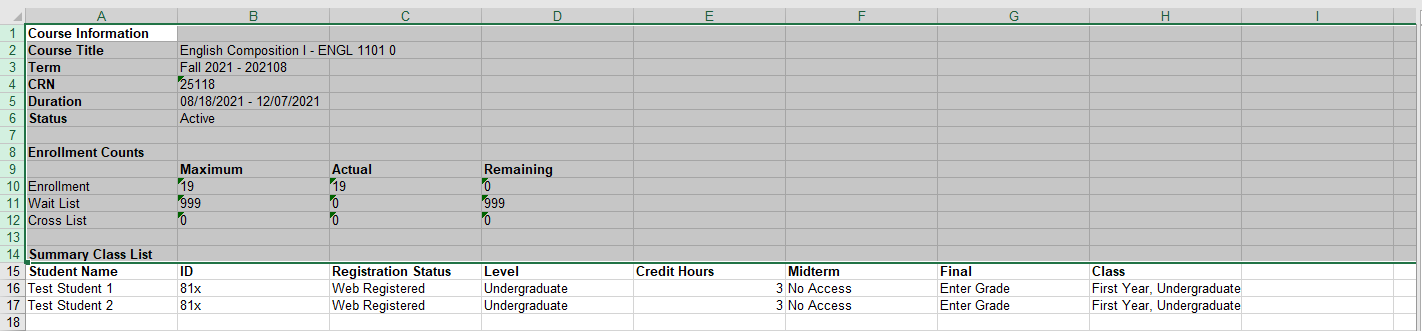
- Right-click and select Delete to remove the rows from the spreadsheet.

- To match the data in Athena Faculty Grade Entry, this spreadsheet must contain the columns Student ID (81x), the course CRN, the term code, and the final grade. The columns can be in any order.
- Note: Any F or U grades will require a date in the Last Attend Date field.
- Term and CRN must be added. Last Attend Date must be added if importing an F or U grade. To insert these columns, right-click on a column then click Insert to insert new columns as needed.
- Term, CRN, and Last Attend Date have been added in the example below.

- Fill in the missing data in the spreadsheet to prepare for importing.
- To navigate to Faculty Grade Entry, select Faculty & Advisors on the Athena home page.
- Click on the Classes & Grades title on the Faculty & Advisor Services landing page, then navigate to Grade Entry.
- Select the Gear icon in the top-right corner of the screen. This will open a dialog box.

- Click Import.
- Select the exported file from eLC downloaded in Step 1 and click Upload.
- Click Continue.
- This opens the Preview page and displays the document uploaded.
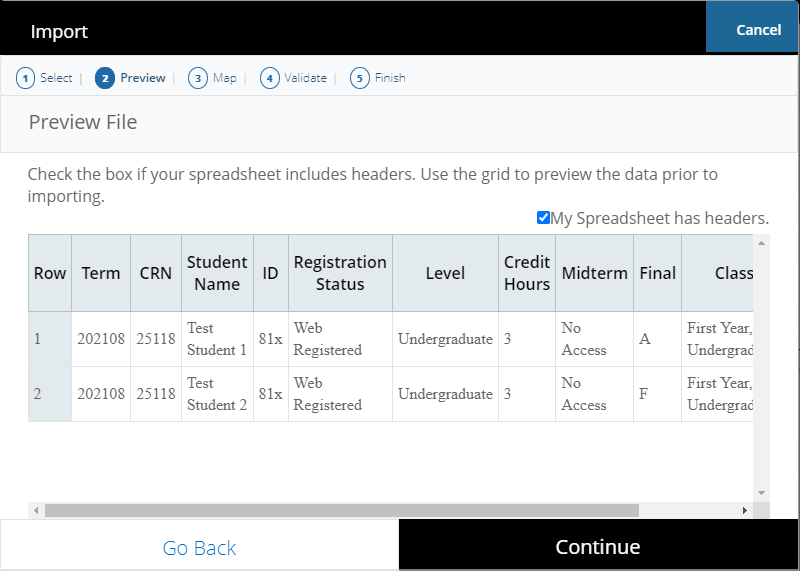
- If the spreadsheet has headers, keep the My Spreadsheet has headers checkbox marked.
- Click Continue.
- This opens the Map Columns screen and has options to match the columns from the uploaded spreadsheet to the Athena format.
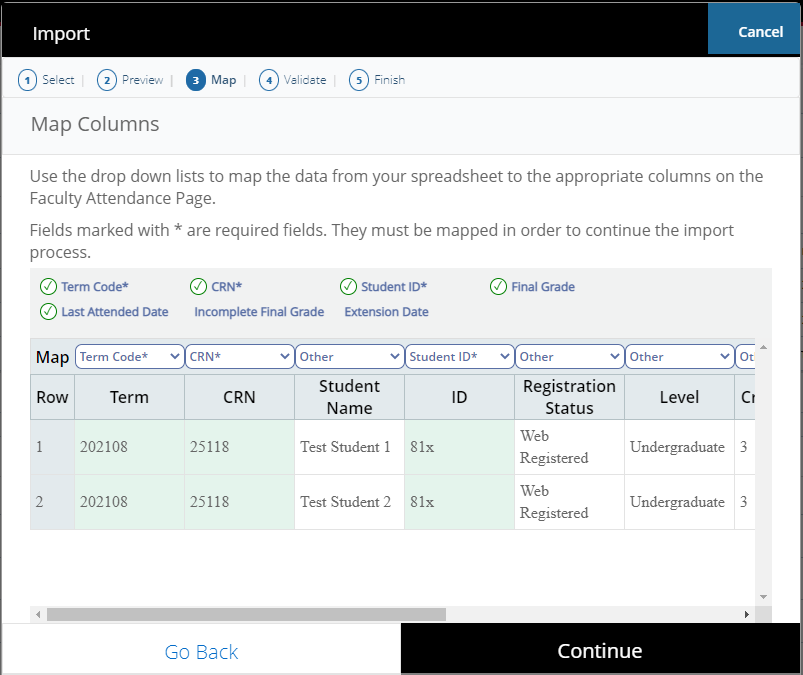
- Click the drop-down column headers and select the appropriate header to match the spreadsheet columns being imported.
- For example, select Student ID for the column that contains 81x numbers.
- Note: Only Term Code, CRN, Student ID, Final Grade, and Last Attended Date (if the Grade is an F or U) must be mapped to successfully import grades.
- Click Continue.
- This opens the Validate screen to check for errors in the spreadsheet.
- If there are errors, click the Download the validation report link to see where the errors can be found.
- For example, an error will appear if the same grade has already been uploaded or there is no last attend date for a grade of F or U.
- If there are errors, click the Download the validation report link to see where the errors can be found.
- Click Continue.
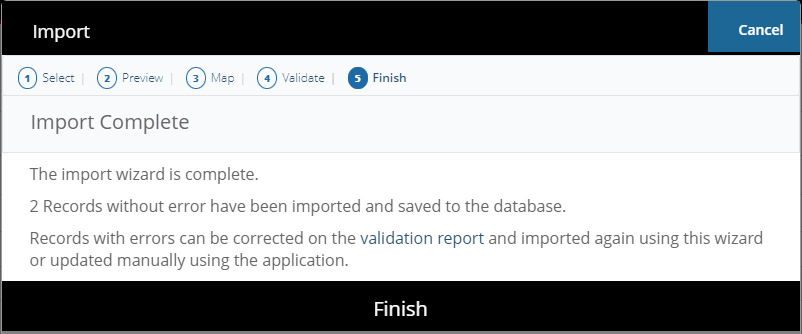
- Grade import is complete. Click Finish.
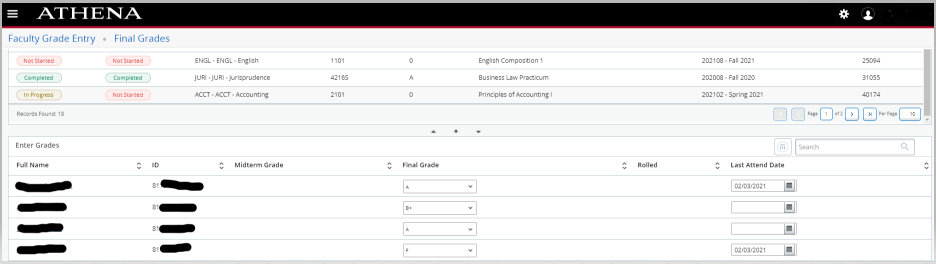
- Click on the course in Athena Faculty Grade Entry and the grades will appear for the students.

- There is a video tutorial on the Office of the Registrar website that shows in more detail how to enter grades using this tool in Athena.
Import from eLC
- Export the course grades from eLC.
- To match the data in Athena, this spreadsheet must contain the columns Student ID (81x), the course CRN, the term code, and the final grade. The columns can be in any order.
- Note: Any F or U grades will require a date in the Last Attend Date field.
- Term and CRN must be added. Last Attend Date must be added if importing an F or U grade. To insert these columns, right-click on a column then click Insert to insert new columns as needed.
- Term, CRN, and Last Attend Date have been added in the example below.

- Fill in the column with the final grades and any other missing data that is needed, such as term.
- To navigate to Faculty Grade Entry, select Faculty & Advisors on the Athena home page.
- Click on the Classes & Grades title on the Faculty & Advisor Services landing page, then navigate to Grade Entry.
- Select the Gear icon in the top-right corner of the screen. This will open a dialog box.

- Click Import.
- Select the exported file from eLC downloaded in Step 1 and click Upload.
- Click Continue.
- This opens the Preview page and displays the document uploaded.
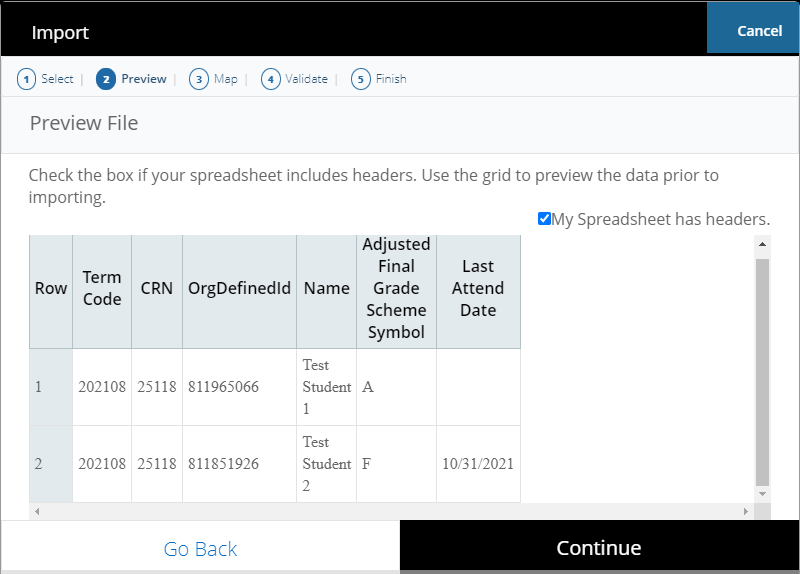
- If the spreadsheet has headers, keep the My Spreadsheet has headers checkbox marked.
- Click Continue.
- This opens the Map Columns screen and has options to match the columns from the uploaded spreadsheet to the Athena format.
- Click the drop-down column headers and select the appropriate header to match the spreadsheet columns being imported.
- For example, select Student ID for the column that contains 81x numbers.
- Note: Only Term Code, CRN, Student ID, Final Grade, and Last Attended Date (if the Grade is an F or U) must be mapped to successfully import grades.
- Click Continue.
- This opens the Validate screen to check for errors in the spreadsheet.
- If there are errors, click the Download the validation report link to see where the errors can be found.
- For example, an error will appear if the same grade has already been uploaded or there is no last attend date for a grade of F or U.
- If there are errors, click the Download the validation report link to see where the errors can be found.
- Click Continue.
- Grade import is complete. Click Finish.
- Click on the course in Athena Faculty Grade Entry and the grades will appear for the students.
- There is a video tutorial on the Office of the Registrar website that shows in more detail how to enter grades using this tool in Athena.
Mass Uploading Workaround
The following process will still allow faculty to mass upload their grades while a solution from the vendor is pending. Please refer to the provided sample spreadsheet.
-
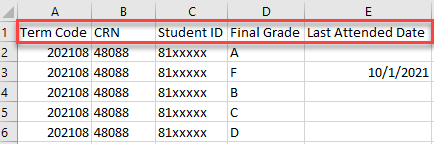
On the import spreadsheet, fill in the Term Code, CRN, Student ID, and Final Grade fields
- Include Last Attended Date if a grade of F or U, as shown in the screenshot example.
- If a personal spreadsheet is used, add a “Narrative Grade Comment” column header after the last column currently in the spreadsheet.
- Do not fill in any value in the column other than the header.
- Note: If the spreadsheet template is used from above or is exported from Athena to fill out, this column will be there as the final column on the right.

Example Spreadsheet Headers
-
Once the “Narrative Grade Comment” column header is added, save and import the spreadsheet
-
On the header mapping portion of the import, confirm that the “Narrative Grade Comment” header mapped correctly

Example Correct Header Mapping on Import Spreadsheet
-
Proceed through the rest of the import process and select the “Finish” option
-
The grades will then populate in Athena for the selected CRN
How to Print Submitted Grades in Athena
How to print submitted final grades for record keeping
Using Export Template Option
- Log into Athena and select the image on the Faculty Services tile.
- Select Classes & Grades, then Grade Entry.
- Select the appropriate CRN to access the grades you wish to print.
- Click the gear icon in the top-right corner of the page.
- Click “Export Template” and then “Export” to export an Excel version of the grade list.
- Open the Excel document, select “File,” and then “Print” to print the grade list.
Using Student Roster Option
- Log into Athena and select the image on the Faculty Services tile.
- Select Classes & Grades, then Grade Entry.
- To reorient your page to Student Roster view, re-size the screen by selecting the box icon in the top right corner of the browser next to the “X” option.
- Select the appropriate CRN to access the grades you wish to print.
- Click the “Student Roster” option on the bottom right of the course to view the list of students and grades.
- Select “File,” then “Print” on your browser to print the grade list.
Prior Term Grade Changes
How to Submit/Approve a Grade Change Request
Instructor and Approver Guide for Prior Term Grade Changes
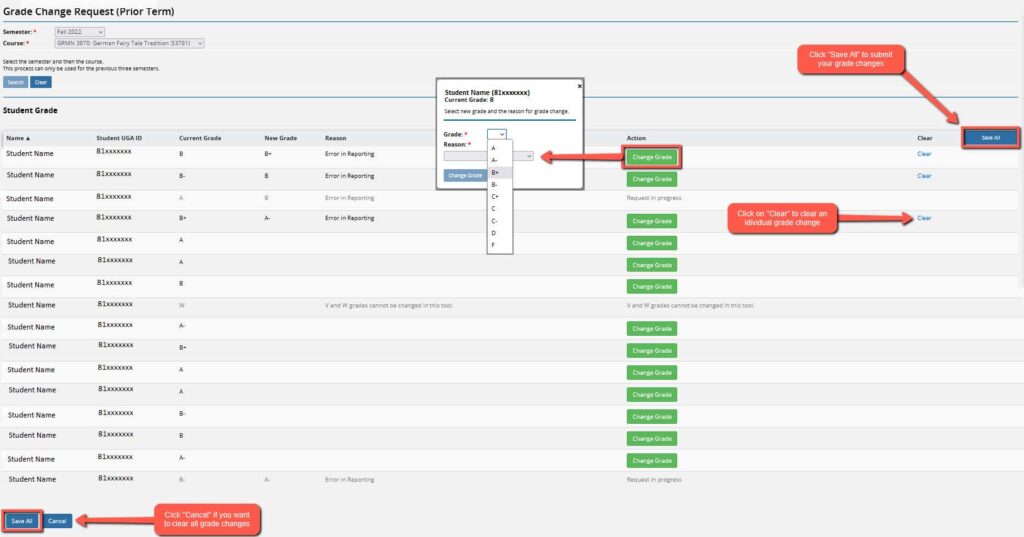
Instructor Guide
-
Login to Athena
-
Select the Faculty Services tile
- Select Classes & Grades
- Select a Grade Change (Prior Term)
- Select a Semester
- Select a Course
- Click Search
-
Click the green Change Grade button
- Select new grade from the Grade dropdown menu
- Select reason from the Reason dropdown menu
- Click the blue Change Grade button
- Click Save All to submit grade changes
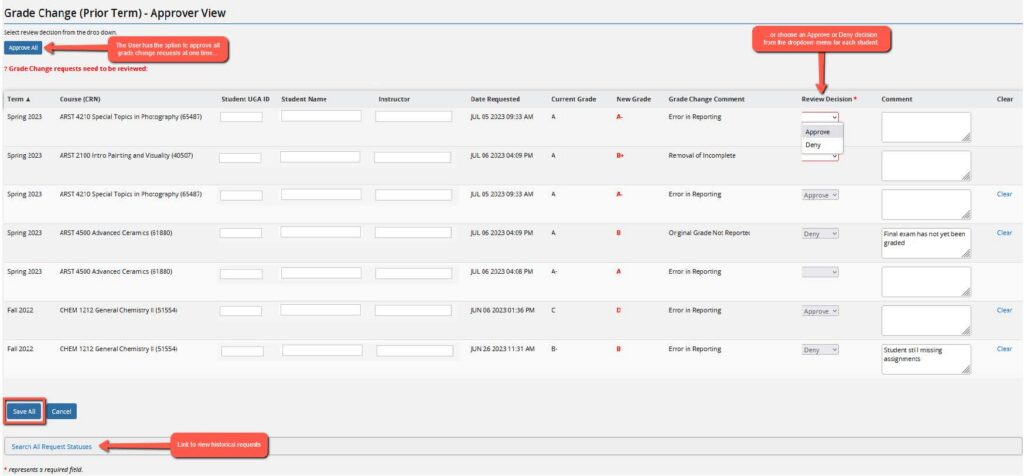
Approver Guide
-
Login to Athena
-
Review grade change requests for prior terms
- Click on the image in the Faculty Services tile
- Select Classes & Grades
- Select a Grade Change (Prior Term) – Approver View
- Click on Approve All, or click on Review Decision for individual decisions
- A Comment is required for a denied request
- Select Save All
-
Search for previous grade change requests
- Click on Search All Requests Statuses
- Enter one or more filters
- Select Search
Questions?
For additional assistance, please contact the Office of the Registrar at [email protected] or 706-542-4040.
For technical support, email [email protected]